Tunisian Crochet is fun and can be very meditative. Here is how you make a traditional foundation row to get started.
Now turn your work sideways, so you can see all the bumps that might usually be on the back of your work. These are the loops you will insert the hook into.
Choose whatever works best for you with a specific Tunisian Crochet Project.
If you are a newbie to Tunisian Crochet, try it!
Updated September 2021. Originally posted as part of the Tutorial: Tunisian Top Stitch from 2016.
Tunisian Crochet in General
Is this your first try on Tunisian Crochet? If so, you should know it is all about a forward motion/ forward pass and a back motion/return pass. On the forward pass, you pick up loops. On the return pass, you finalize each of the crochet stitches.You also insert the hook a little different from regular crochet in most cases - as you have other options here - which makes the stitches look a bit different too.
However, the way you work each of the stitches is still crocheting.
The outcome of a Tunisian Crochet piece can be a lot more like knitting, which is great for the drape and thereby for making wearables, scarfs, and other soft crochet pieces.
Tunisian Foundation Row
Choose a yarn and a hook that is at least two sizes bigger than the yarn label suggests. Most hooks will easily have space for 10 stitches on the neck. Else, just make fewer chains in this tutorial.
1) Chain row
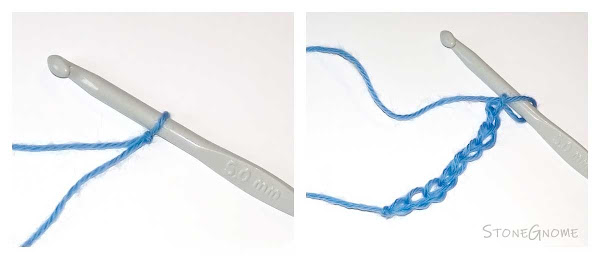
Make a slip stitch and insert the hook. Crochet 9 chains for a foundation. This will give you 10 stitches, as the loop on your hook is number 10.Now turn your work sideways, so you can see all the bumps that might usually be on the back of your work. These are the loops you will insert the hook into.
2) Forward Pass - pick up loops
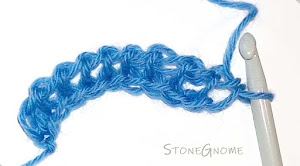
Insert your hook into the first bump, right next to the hook. (Some skip the first bump and it CAN be difficult to hook into. So if it suits you better, do that.)Yarn over (yo) and pull through one loop. You now have 2 loops on the hook. They stay there during the forward motion.
*Insert the hook into the next bump, yo, and pull through one loop only.* Repeat this till you have used all bumps. When you have reached the end, you have 10 loops on your hook.
*Yo and pull through two loops.* Repeat until you only have one loop left on the hook.
AVOID the temptation to pull tight, when there is only one loop left on the hook. You can tighten your work so much, that it is difficult to proceed from here with a nice result.
*Insert the hook into the next bump, yo, and pull through one loop only.* Repeat this till you have used all bumps. When you have reached the end, you have 10 loops on your hook.
3) Return Pass - complete each stitch
Chain one. (Yo and pull through one loop only). This is the left edge of your work.*Yo and pull through two loops.* Repeat until you only have one loop left on the hook.
AVOID the temptation to pull tight, when there is only one loop left on the hook. You can tighten your work so much, that it is difficult to proceed from here with a nice result.
Tadaa!! Now you are ready for your next row :)
From here most people learn the Tunisian Simple Stitch (tss), the most commonly known stitch in the Tunisian Crochet world.
You could also try something nice and a bit different like the lovely Tunisian Top Stitch. It's one of my favorite stitches and it doesn't get enough attention in the crochet world.
You could also try something nice and a bit different like the lovely Tunisian Top Stitch. It's one of my favorite stitches and it doesn't get enough attention in the crochet world.
You will find a tutorial right here: Tutorial: Tunisian Top Stitch
Did You Know?
Instead of starting with a chain row, it is also possible to do a cast-on. You can either do the Tunisian Single Hook cast on or the Tunisian Crochet Cast On. The last one requires two hooks but is really beautiful and very popular on this site.
Choose whatever works best for you with a specific Tunisian Crochet Project.


